|
|
|
|
|
||
| How do I do it? - The Long Answer Camera - Like star trail photography, you only need a camera which has a shutter that can be locked open. This usually means a 35mm single lens reflex camera. But check your instruction manual, your camera, however weird it might be, may have the ability to lock the shutter open. Batteries - Cold kills batteries. Make sure you have fresh batteries in your camera, or carry an extra set in case they die in the middle of the night. Cable Release - It really helps to have a cable release to lock the shutter open during the time exposure. Some cameras, like the Nikon F3 have a T, or TIME setting, where the shutter stays open until the shutter speed dial is turned to another setting. If your camera has this kind of shutter setting, then you can use the self-timer to open the shutter. Tripod - You don't need a tripod. You can use a bean bag placed on a sturdy surface, like the ground, or a picnic table, or the roof of your car. Don't lean on the car or get in it, or open or close the doors during the exposure though because if the thing the camera is on moves during the exposure, the stars will move too, and will not show up as nice, aesthetically pleasing, straight lines. Of course, if you have a tripod, use it! Film - The best kind of film to use is a fast film with a high ISO speed rating like Fujicolor 800 or Kodak Pro 400 PPF, but any kind of fast film will work. The faster the film you use the fainter meteors you will record. A color negative film has more exposure latitude and can be color and density corrected when printed. If you overexpose a transparency film at a site that has light pollution, your photos will probably not look that good, and fainter meteors will be lost in the skyfog. Lens - What kind of lens should you use? Well, the one you have of course! If you have a more than one, then you have some variables to think about which will be discussed below. Aperture - Use your lens at the widest aperture that it has. That means if the lens has 2.8, 4, 5.6, 8, 11, 16 on the aperture ring, use f/2.8. If your lens is only f/4, use f/4. Focus - Make sure you focus the lens at the infinity setting. Exposure - The exposure you should use will be determined by the darkness of your shooting location, the speed of the film you are using, and the maximum aperture of your lens. If you have a dark site, where you can see the Milky Way, then using a lens with an aperture of f/2.8 and a 400 or 800 speed film, try exposures of 10 or 15 minutes. If your site is not that dark, you will have to use shorter exposures. When to shoot - The best time of the night to shoot meteors is between midnight and the start of dawn, with the early morning hours being the best. This is because the Earth will be rotating into that point in space that contains the debris left behind from the meteor's parent comet and the meteors will have the greatest speed. The point in the sky where the meteors appear to come from is called the radiant. It will be highest in a dark sky just before the start of astronomical twilight. Location: Where to shoot from - One of the most important things for most kinds of astrophotography, including meteor photography, is a dark sky. Your back yard may be darker than the street in front of your house, but if you live in the city or suburbs, your backyard is not dark. You need to find a location out in the country, away from city lights. Hopefully it will be someplace you can see the Milky Way if it is up. If you don't know any place like this, contact a local astronomy club and they can tell you good places to try. If you don't know a local astronomy club, contact a planetarium or science museum or college astronomy department and ask them if they know of any dark locations, or if they can put you in touch with a local astronomy club. If you don't live in a city that is large enough to have a planetarium or college, then you are half-way to dark skies already! Just drive out to the country. Look for a state park or state forest. If you go to a campground stay away from the coleman lanterns and campfires! Basically you want to be someplace where there aren't any lights! If you can't get that far away from the city lights, at least go as far as you can to the east of the city. This will put the light pollution from the city to the west, which will be at your back when you shoot towards the north, east, south, or overhead. Aiming - Where should you aim your camera in the sky? You might think you should aim it at the radiant where the meteors appear to come from, but it turns out you will have more of a chance to catch a meteor on film if you point your camera about 45 degrees away from the radiant. Unless you are in the very lucky position on the earth for an extremely rare meteor storm, you won't see any meteors at the radiant. If you do, they will be coming straight at you and will be head on, and will look like points on the film and not meteor trails. This can be amazing if you are witnessing a meteor storm, but recording head-on meteors in a regular shower would be a very low percentage probability. Imagine railroad tracks receding to a point in the distance. The tracks in reality are parallel, but as they get farther away, then seem to converge. It is the same way with rays of sunshine and meteors. They actually enter the Earth's atmosphere parallel, but due to the effects of perspective, they too appear to radiate out of a central location, which is the sun for rays of sunshine and crespucular rays, and the radiant for meteors. If the radiant is on the horizon, the you will only be seeing half of the potential hemisphere where meteors are possible, so you should shoot somewhere in the eastern half of the sky, between the horizon and the zenith. Once the radiant is high in the sky, meteors can almost appear anywhere in the sky. But your best chance for recording a meteor with a nice long trail will be between 45 and 90 degrees away from the radiant. Shooting higher in the sky will also give you a darker sky, and the meteors will be brighter because they are less affected by atmospheric extinction. So, if you don't know where the radiant is, or don't even know the constellations, then just point the camera to the northeast or southeast, about 45 or 60 degrees above the horizon. |
||
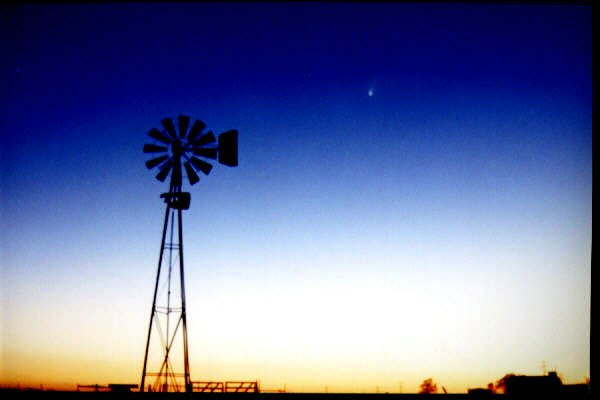 COMET HALE-BOPP WITH WINDMILL PHOTO BY JASON BROCK |
||
| Miscellaneous Stuff Tape - Tape down the focus at the infinity setting. Tape down the aperture at its widest setting. Lots of things can go wrong in the dark! Eliminate as many as possible. Lock the Mirror Up - If you can, before you open the shutter. The mirror can vibrate and shake the camera when it flops up out of the way before the shutter opens, and this slight jiggle can ruin your star images in the photo. Hat Trick - The "hat trick" is simply using a card, or your hat, or your hand, in front of the lens when you open and close the shutter. That way, if you knock the camera a little, your "hat trick" will be blocking the sky and you won't get messed up star images in your photos. Dew - Be on the lookout for dew forming on the lens during the exposure. This is an all too common occurrence nearly everywhere, except possibly the desert southwest. The best solution is to apply gentle heat to the lens in the form of a special heating element called a Kendrick Dew Remover. You can also make one yourself if you are handy electronically, you just have to hook some resistors up to a battery. Do a search on Google to find detailed instructions. Another solution is to use a hair dryer on the lens every couple of minutes during the exposure. You can use either 120 volts if you have access to it, or get a 12 volt hair dryer that plugs into your cars cigarette lighter from a boat or marine accessory supplier. Be sure not to point the hair dryer directly into the lens if the heating element is visible as it may glow from the heat. Aim it from the side, outside of the lens' field of view. The worst attempt to solve a dewed lens is to try to wipe it off. Dew forms when the temperature of the lens falls below the dewpoint. Wiping it off does not change the temperature, and the dew will just form again in a couple of minutes. Dress Warm - Over-dress for the cold. When you are outside at night in the cold, and you are not moving around much, it usually feels about 10 or 20 degrees colder than it really is! Wear layers, and make sure to wear a hat or something to prevent heat loss from your head. Observe - Don't forget to observe! Take along a pair of binoculars to observe any smoke trails that may be left behind after a meteor burns up in the atmosphere. How much film should you shoot? Because you want to shoot with a fast film and a fast lens to record faint meteors, you will reach the sky fog limit relatively quickly. So you will be shooting a lot of short exposures rather than one long one. Plan to shoot as many frames as you can. The more you shoot, the more chance you have of recording a meteor. During the 1998 Leonid shower, I had six cameras going concurrently with 16mm, 18mm, 24mm, 35mm, 50mm, and 85mm lenses. I shot 5 - 10 minute exposures consecutively for about 5 hours. I ended up with about 30 frames per roll, for a total of 180 frames. I recorded 3 meteors. One was not even a Leonid, it was a sporadic (random meteor not associated with the shower). So you have to shoot a lot of film to increase your chances! Film is relatively inexpensive compared to the cost of your camera, and you probably won't shoot more than a roll in a night anyway. If the film cost about and processing at K-Mart cost , that's worth it to capture a meteor! |
||
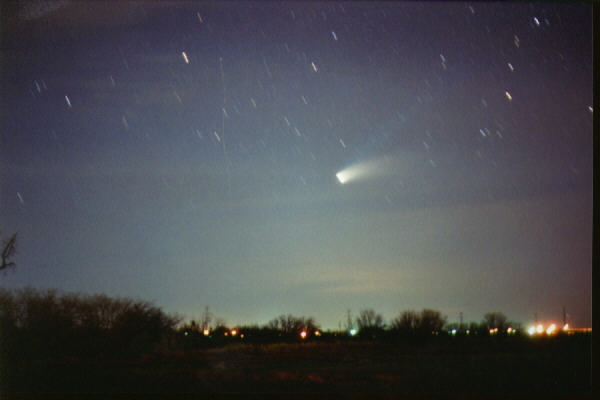 COMET HALE-BOPP PHOITO BY JASON BROCK |
||
| Discussion Of course, meteor photography can get complicated too! Meteors are essentially point sources. And recording, or seeing, point sources is dependent on aperture. So the faster your lens, for a given focal length, the more aperture it will have. Extended sources, like nebulae, are dependent on focal ratio or the "speed" of the optical system With extended objects, the faster the optical system the better. The fact that the meteors are moving adds other considerations. A wide angle lens will capture more sky, increasing your chances of recording a meteor. But the trail will be smaller because the image scale will be smaller. Lets look at the example of the same meteor captured on two cameras, one with a wide angle lens, and one with a moderate telephoto, assuming that the trail is short enough to fit inside the frame of the telephoto. Since the meteor is essentially a point source, aperture is what counts here. Don't be fooled by the apparent diameter of the front element of your lens, in the 16mm fisheye, it is about 3 inches, but the true aperture is only 5.7mm. You can go about 1.5 magnitudes fainter with each doubling of aperture. So if I were shooting the 16mm at f/2.8 at 5.7mm aperture, and an 85mm f/1.8 shooting wide open at an aperture of 47mm, that would be about a little more than a three times doubling of the aperture. So the 85mm can record stars that are about 4.5 mags fainter. However, the situation is complicated because the meteor moves. On the telephoto it is on a given part of the film for less time. On the fisheye it is on a given film grain longer, effectively giving it more exposure. This is also complicated because the brightness, speed, and trail length of meteors vary. So, on one hand, you can record much fainter meteors with larger aperture telephotos, but you have much less chance of recording one in any given section of sky, not to mention framing it correctly. I observed visually during the exposures I made during the Leonid shower. I would guesstimate about 1/4 of the total time. In that time, I visually observed around two dozen meteors, about 2/3 of which were Leonids. So extrapolating, I would guess there would have been about 100 meteors total that night (adding in a compensation factor for not being able to observe the entire sky visually). I know there were many faint meteors in the frames of some of the cameras, yet they were not recorded at all on the wide angle lenses, probably because the lenses just did not have enough aperture. Conclusions: if you have multiple cameras and lenses, be sure to shoot at least one very wide angle and hope for bright meteors. If you have unlimited resources, set up a gigantic cluster of 50mm lenses, and shoot a mosaic of the entire sky. Practically, you use what you have, you shoot wide open with a fast film, you point it somewhere. Ya pays yer money and ya takes yer chances. Just be sure to go somewhere dark! |
||
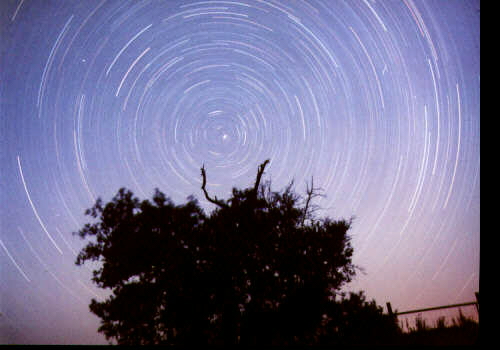 STAR TRAILS PHOTO BY JASON BROCK |
||